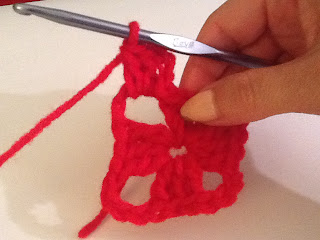
But, here is a photo tutorial on how to make a simple, classic granny square. The interesting twist in how the square is started. Enjoy!
I used some Red
Heart worsted weight yarn and an H hook:
Round
1: Chain 7. In first chain (also referred to as "7th ch from
hook"), make 3 double crochet (dc) stitches.
Then,
chain 4 (that will be the corner) and 3 dcs into same first chain (second side
made)
Chain
4 (second corner made) and 3 dcs into same first chain (third side)
Chain
4, but this time, make only 2 dcs into first chain (first picture below)
because you are going to slip stitch into the third chain of the original
chains you made at the beginning and count that as the third dc to finish up
the fourth side (second picture below)
Now
you've finished the first round!
Now,
make 2 dcs next to the ch-3
then
chain 4 and 3 dcs (new corner)
To
get to the next corner, chain 2, then 3 dcs in next corner
To
finish this corner, chain 4 and make 3 dcs. Then, chain 2 to get to the
next corner. Repeat the [3 dcs, ch 4, 3 dcs] to make the remaining
corners. When you've finished the last corner, chain 2 and slip stitch
into top of ch-3 at the beginning of the round.
Ok,
round 2 is done! To make the third (and more rounds if desired), you'll
want to fasten new yarn to one of the corners and make the corners in the same
way as the corners in round 2. When you get to a chain-2, make 3 dcs in
that space and chain 2 to get to the next corner.
If
you feel like the square is too air-y and open, then you can chain 3 in the
corners (rather than chain 4) and chain 1 along the sides (rather than chain
2).
After
the third round, my square is 5 inches. The third round took up almost 19
feet of yarn! The second round used up about 12 and 1/2 feet of yarn, and
the first round used almost 7 feet.


